Homemade Apple Scrap Vinegar
From apple peels & cores
One of my favourite things about growing and cooking food is finding ways to use what we have before anything goes to waste.
This is how I make apple scrap vinegar using the peels and cores left over from apples. It takes a little patience, but very little actual work — and there’s something rather satisfying about watching the whole process happen on the kitchen bench.
You’ll need
Apple peels and cores
Cooled boiled water
About 2 tablespoons sugar per large jar
A clean glass jar
A clean cloth and rubber band
How I make it
1. Fill your jar with apple scraps
I aim to fill the jar roughly halfway with apple peels and cores. There’s no need for exact measurements — this is very much a use-what-you-have recipe.
2. Add the sugar and water
Add a couple of tablespoons of sugar, then fill the jar with boiled water that has been allowed to cool completely.
You don't want to pour boiling water over the apples because we want the microorganisms responsible for fermentation to stay alive.
Make sure the apple pieces are submerged beneath the water as much as possible.
3. Cover and leave to ferment
Cover the jar with a clean breathable cloth and secure it around the top. Don't seal the jar airtight at this stage.
Then leave it somewhere out of direct sunlight and let nature get to work.
Check it periodically and keep the fruit submerged. Fermentation can look a little strange at times — bubbles, cloudiness and sediment can all appear as it changes.
4. Wait for the mother
Over the next 4–6 weeks, you may notice a gelatinous layer developing across the surface.
This is the vinegar mother — a cellulose layer produced by the bacteria involved in turning the alcohol created during fermentation into acetic acid.
It may not be particularly pretty, but it's a very good sign!
5. Strain
Once the apples have done their job, strain out all of the peels and cores and return the liquid to a clean jar.
Cover it again and leave the vinegar to continue developing.
Over time, the flavour and aroma become increasingly sharp and vinegary.
How do you know when it's ready?
Taste it.
Once it has lost its sweetness and has developed the acidity and vinegary flavour you're looking for, it's ready to use.
I like this method because there really isn't a precise Day 42: your vinegar is finished moment. Temperature, apples and fermentation all affect how quickly it develops.
A little food-safety note
Technically, this is apple scrap vinegar rather than traditional apple cider vinegar, because we're fermenting apple scraps and sugar water rather than pressed apple cider.
And because homemade vinegar doesn't have a standardised acidity, don't use it for water-bath canning, pickling or preserving recipes that rely on vinegar of a specified acidity for food safety. Use commercially produced vinegar of the required strength for those.
For everyday kitchen uses where precise acidity isn't required, though, homemade apple vinegar is a lovely thing to have on hand.
TRIED & TRUE
This isn't something I've made once for a photograph. It's one of those wonderfully simple processes that reminds me why I love growing and making things from scratch.
Use the apple.
Save the scraps.
Make vinegar.
Compost what's left.
Love the soil. Grow good food. Waste less. Eat well.
The mother has formed
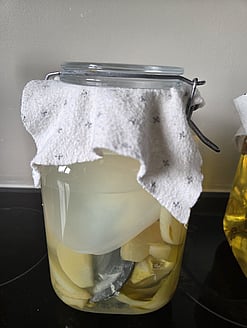
Adding your scraps to a jar and adding sugar and cooled boiled water
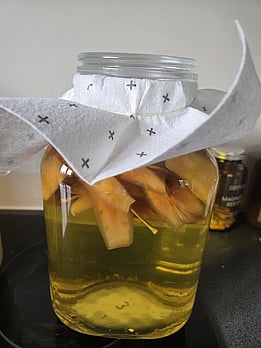
The final fermentation
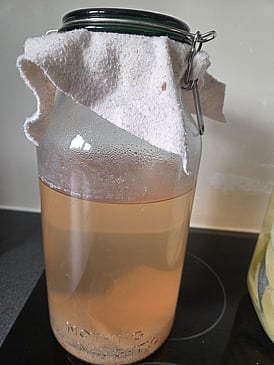
Using your vinegar for pickling
I’ve used my homemade apple vinegar for pickling for years, and it’s one of my favourite ways to use it.
Because homemade vinegar can vary in strength from batch to batch, you can test its acidity if you want to know more about what you've made. Just be aware that ordinary pH strips don't tell you the percentage of acetic acid in your vinegar.
For quick or refrigerator pickles, I happily use my homemade vinegar and keep the finished pickles refrigerated.
If you're making shelf-stable preserves using a tested recipe that specifies 5% acidity vinegar, the safest option is to use commercially produced 5% vinegar unless you've had your homemade vinegar's acidity properly determined.